The easiest DIY green tea cleanser to make at home. You probably would have read a lot of articles on the health benefits of drinking green tea. But did you know that its miraculous properties have skin benefits as well?
DIY green tea cleansers here that will help you to recover from skin issues. Green tea is the booster that you can add to your beauty products and combat acne.
Scroll down and learn some new and unique ways to use green tea in your freshly prepared beauty products. Also, pin down your favourite DIY green tea face wash recipe and create it at the comfort of your own home.
Let’s get started.
Can I use Green Tea as a Face Cleanser?
Green tea contains anti-inflammatory properties which aim to reduce skin irritation, providing ease to your skin. It helps you to get rid of redness, swelling and unwanted pimples.
Applying green tea can freshen up your skin and leave a nourishing effect. It gives a natural touch to your skin which many of us crave to have. Yes, you can definitely use green tea as a face cleanser without any second thoughts. Just apply the patch of DIY green tea face cleanser on half of the side of the face and rinse off. If you don’t get any side effects, you are good to go.
Check out simple DIY green tea toner recipe.
Benefits of Green Tea for Face
Along with having numerous health benefits including improved cognitive function and weight loss, green tea is also an excellent remedy for the skin. It can benefit your skin in so many ways.
Here are some of the perks that green tea can add to your life;
- Green tea is high in vitamins, especially vitamin E, which is recognized for nourishing and hydrating the facial skin.
- If you are struggling with intense acne, green tea is your go-to ingredient. Do you know why? Because the essence of green tea has antioxidant, anti-inflammatory, and antibacterial qualities that may make it an excellent treatment for oily skin and acne-prone skin. One of the research postulates that as the polyphenols of green tea touch the skin, it instantly reduces sebum excretion which can lead to acne. Therefore, protecting the face from any potential damages.
- Green tea minimizes the redness and irritation, giving you a clear and flawless face. The high content of polyphenols does more wonder than anyone of us can imagine. This is why applying green tea on cuts or sunburn can soothe the pain.
According to a study, topical green tea is also a useful cure for several dermatological problems. It can give lasting relief from conditions like psoriasis, dermatitis, and rosacea, while also helping with keloids.
- Green tea also assists in fighting premature aging. Premature aging is one of the skin issues that many of us are tired of. But we don’t have to invest our energy experimenting with other things because we got natural green tea as our saviour. Green tea contains the antioxidant, EGCG, which has the ability to regenerate dead skin cells. This antioxidant can fight signs of aging and make drab skin look healthier by protecting and rebuilding your cells. Now isn’t that great?
- Lastly, green tea saves you from deadly diseases such as skin cancer. The antioxidant properties of EGCG can aid in the repair of DNA damage (induced by UV radiation from the sun). As a result, protecting you against nonmelanoma skin cancer.

Uses of Green Tea For Beauty
Now let me walk you through some of the phenomenal ways of using green tea while DIY-ing. You will fall in love with green tea now if you haven’t as of yet.
So keep scrolling.
Here are some of the special techniques of using green tea in your homemade beauty hacks;
#1. Green Tea Steam
We all know that steam is an essential component of a healthy facial. When you expose your face to steam water, the skin absorbs it. How about moving a step further and adding a few drops of green tea to the water for steaming? This way, you will be able to provide your skin with a boost of polyphenols and flavonoids.
Method: Take two glasses of hot water. Add 3 tablespoons of green tea leaves or 2 to 3 green tea bags. Take a towel and surround your head with it. Bent a down a little and enjoy the fantastic steam.
#2. DIY Green Tea Face Mask
Using green tea as a face mask is also one of the possibilities, it will heal the skin and will cleanse it from all the dirt.
Method: Take 1 teaspoon of honey and 2 teaspoons of honey in a small bowl and heat them in the microwave. Take 1 tablespoon of green tea leaves or 1 green tea bag and add that into the mixture. Heat the mixture for another 30 seconds. Cool it down for 25 seconds before applying. Make sure you do not apply the hot mixture as it will burn your skin. Allow it to cool down till it gets warm. Apply it to the face and leave it for 5 minutes.
Soak a handkerchief or cloth in hot water to remove it. Place it on your face for 5-7 minutes after squeezing it. It will release the honey and will also make the removal of the mask easy so that the face doesn’t get sticky. Finally, rinse with water and dry with a soft cloth.
#3. Green Tea Toner for Sunburn
Are you tired of using all these expensive sunscreens that don’t suit your skin? Well, that is not something to stress over. Try out this natural green tea remedy and thank me later.
Method: Make a cup of green tea and add 3 drops of tea tree oil. Set it aside to cool. Apply the toner to the afflicted region with a cloth dipped in it. For a cooling effect, lay the cloth over your face.
#4. Homemade DIY Green Tea Face Cleanser
Expensive cleansers and acne treatments aren’t always required. And they don’t always solve the problem as well. Submerge a green tea bag in hot boiling water for about 10 seconds. Massage for 5 minutes before rinsing.
Green tea polyphenols improve blood circulation while also aiding acne treatment. To know more about this, give a read to the DIY green tea face wash recipe mentioned below.
How to Make a Green Tea Cleanser at Home?
DIY face cleansers are easy to make. This green tea face cleanser recipe will only takes a few minutes and you’re done.
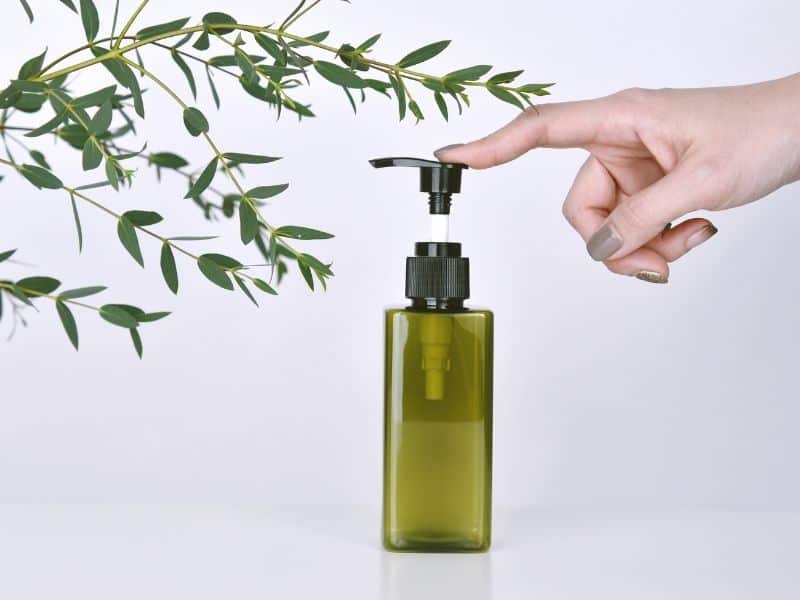
1. DIY Green Tea Cleanser
Ingredients
- 1/4th cup of liquid castile soap
- 1/4th cup of green tea
- 3/4th teaspoons of sweet almond oil
- 3/4th teaspoons of coconut oil
- 3/4th teaspoons of vitamin E oil or olive oil
- 8 to 10 drops of essential oils( You can choose any one essential oil from peppermint, tea tree or eucalyptus oil)
Method
- Make a cup of strong green tea in a hot water.
- Take out the 1/4th cup of prepared green tea from it and allow it to cool down.
- Mix all the ingredients once the green tea cools down completely.
- Take a squirt and pour the mixture into it.
- Shake the squirt well enough after adding the mixture.
Preparation time
10 minutes
How to apply?
- Take out the liquid cleanser in your hands and exfoliate the face in a circular motion.
- Wash the face with lukewarm water.
- Make sure to shake the squirt well before using it every time because the mixture might separate.
This green tea cleanser recipe is the ideal one. This means that you can follow this recipe with the same steps every time. The only thing that will change is the use of oils. For that, you need to go for the oils that suit your skin and that you usually use with other DIY products.
2. DIY Green Tea Face Mask
Ingredients
- 1 tablespoon of green tea
- 1 tablespoon of honey
- 1 tablespoon of baking soda
- 1 cup of water
- A mixing bowl
- Measuring spoon
- Towel
Method
- Prepare a cup of green tea and steep the tea bag for around an hour.
- Allow the tea bag to cool before breaking it apart and separating the green tea leaves.
- To make a paste, combine the green tea leaves, honey, and baking soda in a mixing dish.
- Add a few drops of water if the mixture is too thick.
Preparation time
10 minutes.
How to apply?
- Wash your skin before using the mask to enable it to penetrate your pores.
- Apply the mask uniformly throughout your face after cleaning it, and gently rub it in to eradicate dead skin cells and debris from your pores.
- Allow 10 to 15 minutes for the mask to absorb into your skin before rinsing with warm water.
- Apply the mask one to three times each week for optimal results.
3. DIY Green Tea Oil Recipe
Ingredients
- ½ cup of organic green tea
- ½ cup of Olive oil
- 1/8 cup of sunflower oil
- ¼ cup of jojoba oil
- 8 drops of geranium essential oil
- 4 drops of myrtle essential oil
- 12 drops of lavender essential oil
- 12 drops of rosemary essential oil
Method
- In a glass jar, add all ingredients and shake thoroughly to blend.
- Cover the lid.
- Place it in a cool dark spot for 24 hours.
- To shield the serum from light, pour it into a cobalt blue or dark amber bottle.
- Keep it in a cool, dark spot.
Preparation time
- 25 minutes
How to apply?
- A small amount of skin serum can go a long way! So add a little amount of oil to the center of your hand with an oil dropper.
- Gently spread serum over your face with your fingers.
Easy DIY skin care recipes;
How to make green tea toner at home?
Best DIY facial mist recipes for hydrating skin
Easy DIY peel off mask recipe
10 DIY lip balm recipes for dry lips
Wrap Up – DIY Green Tea Cleanser
DIY green tea cleanser is easy to prepare and can give your skin a therapeutic comfort of the natural elements. All you have to do right now is to go inside your kitchen, grab a green tea from the cabinet and customize your own DIY green tea face wash recipe.
It’s that simple only.
We all are looking for our own unique ways to overcome skin problems yet failing every time. But this time, I want you to trust green tea and see the magic. I am sure you would not regret it. The result wouldn’t be instant though, but you will surely observe the successful outcome.